|
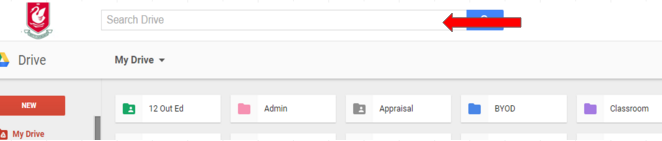
Sometimes we need to get a quick and clear idea of the level of understanding our students have of a concept we have been teaching. This helps us to decide on whether to move ahead with teaching the next concept or adding difficulty to the existing one or whether we in fact need to teach it again in another way. Google Classroom provides us with the perfect way to do this quickly using the Question feature. This can be found when you are in a classroom group by clicking on the + button on the bottom right hand corner. Then click on 'Create Question' 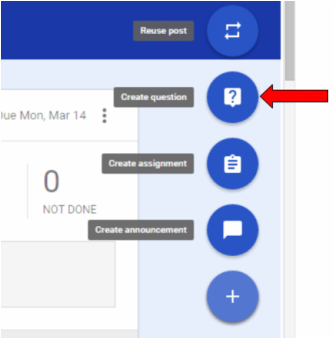 You can add an image or document in relation to your question. The buttons for adding files are shown in the image below by the pink arrows. If you are revising something from a few months ago for upcoming exams or you know that some students are going to struggle to answer the question you also have the ability to provide scaffolding by enabling students to see each others answers. (shown by red arrow). Obviously if you are wanting a clear idea of a students understanding you would switch this off. 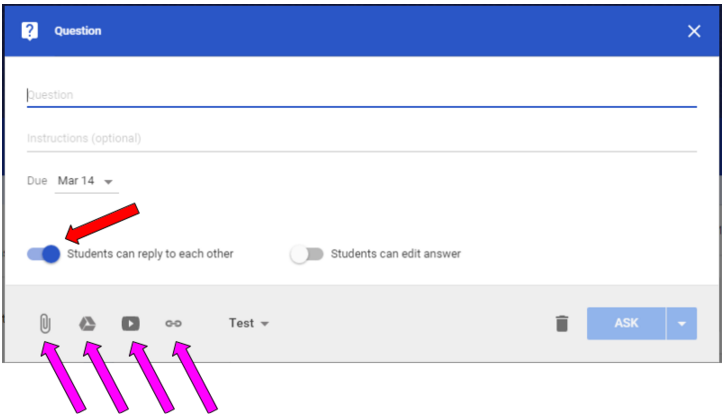 This tool is excellent for using as a DO NOW task at the beginning of the lesson and can help to provide structure to all of your lessons. Students in my junior classes now always get their devices out and answer the Do Now question as soon as they arrive. Similarly it can be used as an Exit ticket prior to leaving class. If you are going to do this, it helps to have the question already done and saved as a draft. To do this create the question as normal and click on the blue arrow next to the blue ASK button. This will allow you to save as a draft. This will then be shown at the top of your stream and you can then click on it quickly to send towards the end of the lesson. It is a good idea to do this with at least 10mins to go in your lesson. The most excellent part of this tool is that you can see who has and hasn't answered the question, which allows you to let students go who have completed it and encourage those who have not to complete it prior to leaving! 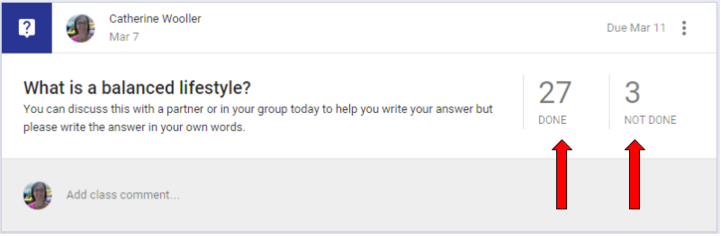 This tool also gives you very accurate information on who is completing work. Which of course can be used for writing reports and talking to parents!
Without organisation, your google drive can quite quickly start to feel quite overwhelming. Like any other storage location, organisation of your files and folders is the answer. After over 3 years of using google drive, I have come up with some standard folders that I think will enable you to sort your drive out. They are shown in the image below. 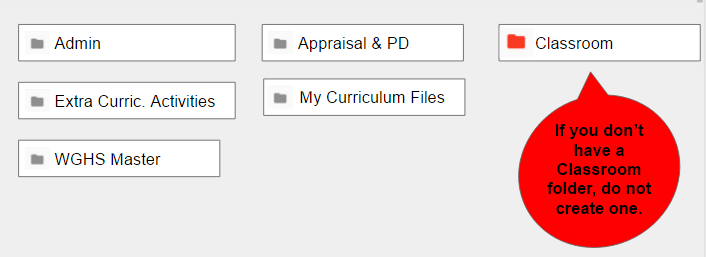 The Classroom folder is a little different to all of the others. DO NOT create this folder if you don't have one in your My Drive. It is created automatically when you send a class an assessment or document in google classroom. All of your students assessments and copies any document you have shared with a class are stored here. Do not go altering class folders within this folder either as this will create alot of confusion. I recommend you make this folder RED, meaning it's a NO GO folder! To To change the color of a folder click right click on the folder, click on 'Change Colour' and select the colour red. MY CURRICULUM FILES In this folder I store any files I have made for particular subjects/courses. So within this folder, I have folders for each of the courses I teach with worksheets, activities, lesson plans etc inside. WGHS MASTER FOLDER This folder is owned by an overall school admin account. If it does not appear in your My Drive, DO NOT create this one either. When you join the WGHS staff, and your accounts are created, this folder is shared with you.
 3. Type in WGHS Master. The file should appear in the search list. 4. Click on it. 5. Click on the little arrow next to WGHS Master title. 6. Click on ‘Move to’ or ‘Add to My Drive’. (mine is already in My Drive so the ‘Add to My Drive doesn’t show on the list below!) 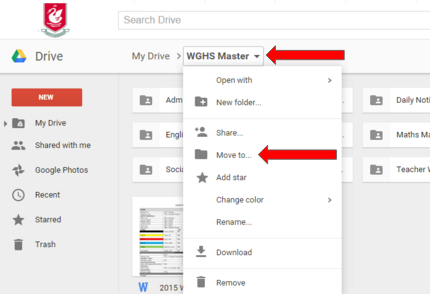 Color coding your folders also helps to make your daily life a little easier when navigating through your drive.
Now it can seem a little overwhelming, trying to get your files sorted. However a little bit of time spent doing this will be well worth it and will definitely make you feel more organised. Happy sorting :)
Of course pedagogy is super important, and admittedly this blog post is not heavy in pedagogy, however sometimes students and some of us teachers like things to look good!!! Here is a collection of new templates from google that I think could be useful for a number of different subjects. All of these templates can be found if you go to www.slides.google.com at the top, click on More and there are quite a few. Slides Carnival is also another useful website I go to for google slides templates when I want something a little different. These are all free of course!
I have also provided some templates to students via the Tech Wizards Blog. The templates were for a newspaper style google doc. I used this for a task in Health. Click here for this blog. And here are some other slides templates that are quite neat also created by the Slides Carnival website and on I've put on the Tech Wizards website.
And below is a new google doc template for completing Science Lab Reports. - click here for a copy.
Following on from the work that Megan Davidson does with students on referencing and creating bibliographies and of course the issue of plagiarism, I thought I would share with you some tools that you can use with your students to help them reference correctly.
During a research unit we complete with our Year 12 Outdoor Education class, prior to them starting to search for any information, we ask students to watch this video on how to use the Easybib add on in google docs. It's helpful for teachers to watch this so that you are aware of how it works. (It's 6 1/2 minutes long so not too bad!). Video: http://goo.gl/njw5dr (video also embeded below) These instructions are something you could put on the About page of your google classroom for students to find easily next time they need it. Last year I sent students a google doc as an assignment in google classroom that is their internal assessment. I did this before they began the researching component as well. This meant that they can search while in this document and enter in the references as they go. Last year I also tried to add the Easybib add on to all students and staff, however follow the steps in the video if the add on doesn't show in your google doc as an add on. (Hopefully it has worked but if not it only takes a minute to add the add on!) Anyway, here are the basic written instructions also. To Get EasyBib
To Add a Source to your bibliography as you go:
This presentation includes instructions for setting up a google site.
|
Categories
All
Archives
February 2021
AuthorPlease be aware these are links to other people's work. Most blog entries are written by me unless stated otherwise. I am happy to share all my ideas. |

|
|
 RSS Feed
